(CLI) Utilities
While UI-based applications are great, sometimes it's just easier to do things from the commandline!
On this page, you'll find various CLI utilities that can be used for spelunking around macOS, or that can facilitate malware analysis:
On this page, you'll find various CLI utilities that can be used for spelunking around macOS, or that can facilitate malware analysis:
ProcessMonitor
Leveraging Apple's new Endpoint Security Framework, this utility monitors process creations and terminations, providing detailed information about such events.
# ProcessMonitor.app/Contents/MacOS/ProcessMonitor -pretty
{
  "event" : "ES_EVENT_TYPE_NOTIFY_EXEC",
  "process" : {
    "signing info (computed)" : {
      "signatureID" : "com.apple.sleep",
      "signatureStatus" : 0,
      "signatureSigner" : "Apple",
      "signatureAuthorities" : [
        "Software Signing",
        "Apple Code Signing Certification Authority",
        "Apple Root CA"
      ]
    },
    "uid" : 501,
    "arguments" : [
      "sleep",
      "666"
    ],
    "ppid" : 12932,
    "ancestors" : [
      2399,
      1
    ],
    "rpid" : 2399,
    "architecture" : "Apple Silicon",
    "path" : "/bin/sleep",
    "signing info (reported)" : {
      "teamID" : "",
      "csFlags" : 570506001,
      "signingID" : "com.apple.sleep",
      "platformBinary" : 1,
      "cdHash" : "1A3D80157484AF62CD5A82190129122958EB1814"
    },
    "name" : "sleep",
    "pid" : 22867
  },
  "timestamp" : "2020-12-16 22:26:40 +0000"
}
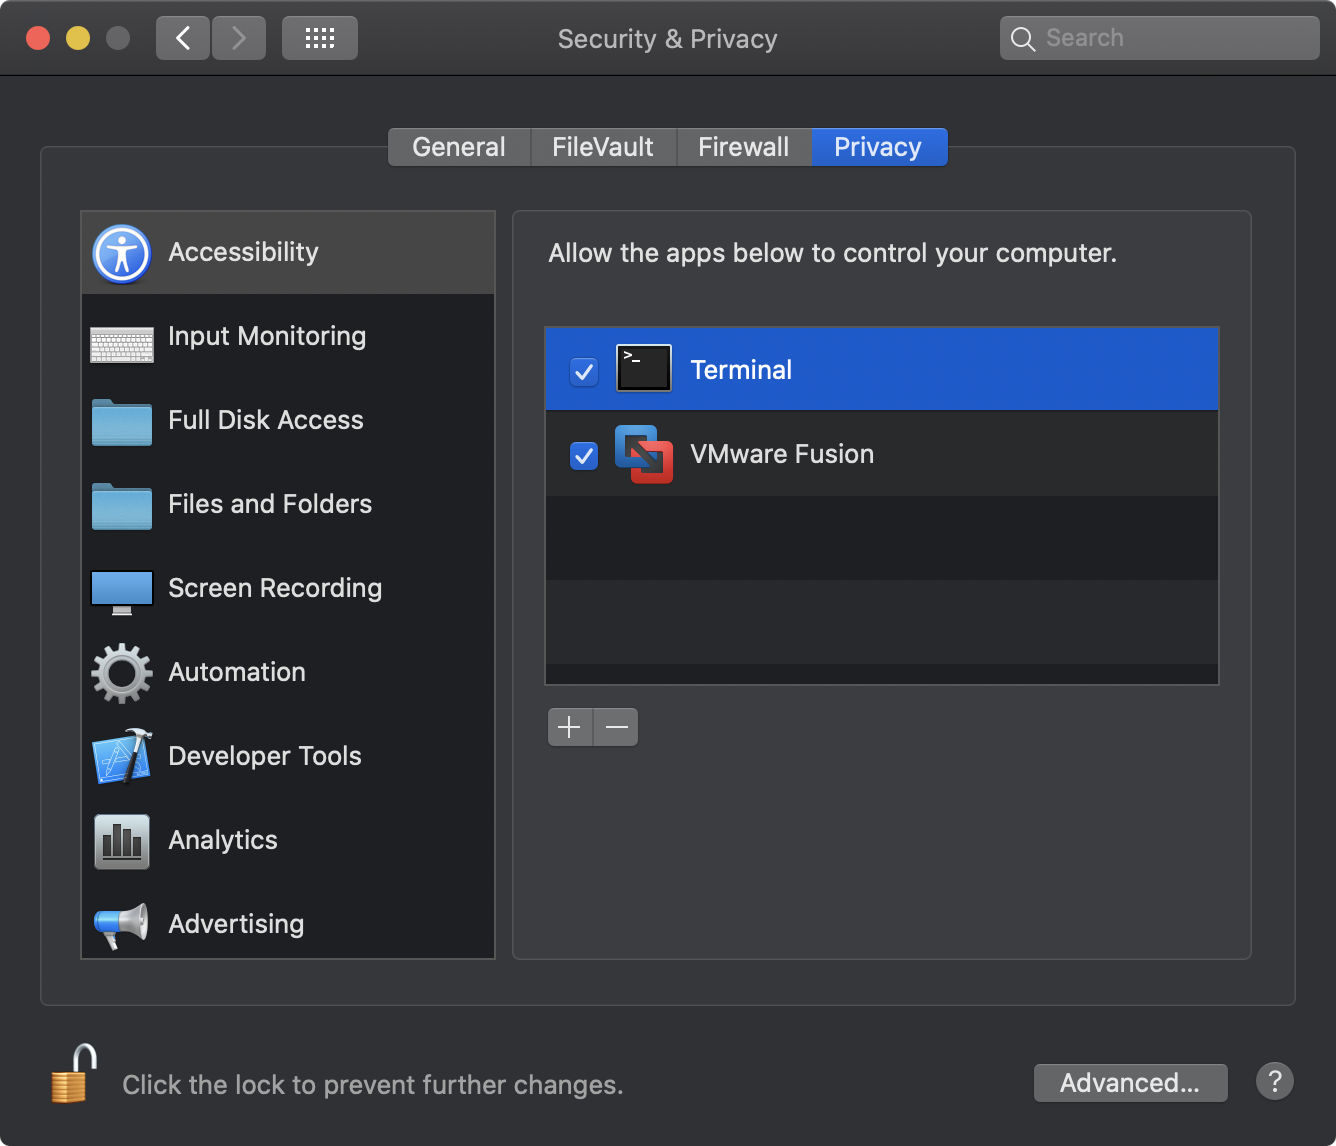
- Terminal.app must be granted "Full Disk Access".
Open the System Preferences application, and navigate to the "Securtiy & Privacy" pane, click on "Privacy", scroll down to "Full Disk Access" and authenticate to add /System/Applications/Utilities/Terminal.app:
- ProcessMonitor must be run as root.
Via Terminal.app execute ProcessMonitor.app/Contents/MacOS/ProcessMonitor either via sudo or from a root prompt:% sudo ProcessMonitor.app/Contents/MacOS/ProcessMonitor
# ProcessMonitor.app/Contents/MacOS/ProcessMonitor

{"event":"ES_EVENT_TYPE_NOTIFY_EXEC","timestamp":"2020-12-16 22:27:55 +0000","process":{"pid":22875,"name":"sleep","path":"/bin/sleep","uid":501,"architecture":"Apple Silicon","arguments":["sleep","666"],"ppid":12932,"rpid":2399,"ancestors":[2399,1],"signing info (reported)":{"csFlags":570506001,"platformBinary":1,"signingID":"com.apple.sleep","teamID":"","cdHash":"1A3D80157484AF62CD5A82190129122958EB1814"},"signing info (computed)":{"signatureID":"com.apple.sleep","signatureStatus":0,"signatureSigner":"Apple","signatureAuthorities":["Software Signing","Apple Code Signing Certification Authority","Apple Root CA"]}}}
Note:
Though ProcessMonitor is distributed as an application (in order to satisfy Apple's codesigning and notarization requirements), it is a CLI utility. As such, it should be executed from the commandline, by specifying the path to its application binary:
Moreover, it must remain in its application bundle (which contains required codesigining and provisioning profile information).
Though ProcessMonitor is distributed as an application (in order to satisfy Apple's codesigning and notarization requirements), it is a CLI utility. As such, it should be executed from the commandline, by specifying the path to its application binary:
ProcessMonitor.app/Contents/MacOS/ProcessMonitor
Moreover, it must remain in its application bundle (which contains required codesigining and provisioning profile information).
When executed with the -h or -help flag, ProcessMonitor will display information about its commandline options:
$ ProcessMonitor.app/Contents/MacOS/ProcessMonitor -h

USAGE:
 -h or -help      display this usage info
 -pretty          JSON output is 'pretty-printed'
 -skipApple       ignore Apple (platform) processes
 -filter <name>   show events matching process name
When executed Process Monitor will output JSON "blobs" to standard out. This output can be controlled by various command line arguments including:
- -pretty
JSON output is 'pretty-printed' (beautified). - -skipApple
Ignore process events related to Apple (platform) binaries. - -filter <name>
Show (only) events matching process name.
For more details on creating ProcessMonitor read "Writing a Process Monitor with Apple's Endpoint Security Framework".
File Monitor
Leveraging Apple's new Endpoint Security Framework, this utility monitors file events (such as creation, modifications, and deletions) providing detailed information about such events.
# FileMonitor.app/Contents/MacOS/FileMonitor -pretty
{
  "event" : "ES_EVENT_TYPE_NOTIFY_WRITE",
  "file" : {
    "destination" : "/private/tmp/output.txt",
    "process" : {
      "signing info (computed)" : {
        "signatureID" : "com.apple.TextEdit",
        "signatureStatus" : 0,
        "signatureSigner" : "Apple",
        "signatureAuthorities" : [
          "Software Signing",
          "Apple Code Signing Certification Authority",
          "Apple Root CA"
        ]
      },
      "uid" : 501,
      "arguments" : [

      ],
      "ppid" : 1,
      "ancestors" : [
        1
      ],
      "rpid" : 2404,
      "architecture" : "Apple Silicon",
      "path" : "/System/Applications/TextEdit.app/Contents/MacOS/TextEdit",
      "signing info (reported)" : {
        "teamID" : "",
        "csFlags" : 570522385,
        "signingID" : "com.apple.TextEdit",
        "platformBinary" : 1,
        "cdHash" : "D07DBA4427C55E9E4FF430BDD03E05ACEC7A7197"
      },
      "name" : "TextEdit",
      "pid" : 2404
    }
  },
  "timestamp" : "2020-12-16 22:33:23 +0000"
}
- Terminal.app must be granted "Full Disk Access".
Open the System Preferences application, and navigate to the "Securtiy & Privacy" pane, click on "Privacy", scroll down to "Full Disk Access" and authenticate to add /System/Applications/Utilities/Terminal.app - FileMonitor must be run as root.
Via Terminal.app execute FileMonitor.app/Contents/MacOS/FileMonitor either via sudo or from a root prompt:% sudo FileMonitor.app/Contents/MacOS/FileMonitor
# FileMonitor.app/Contents/MacOS/FileMonitor

{"event":"ES_EVENT_TYPE_NOTIFY_OPEN","timestamp":"2020-12-16 22:36:57 +0000","file":{"destination":"/private/tmp/output.txt","process":{"pid":2404,"name":"TextEdit","path":"/System/Applications/TextEdit.app/Contents/MacOS/TextEdit","uid":501,"architecture":"Apple Silicon","arguments":[],"ppid":1,"rpid":2404,"ancestors":[1],"signing info (reported)":{"csFlags":570522385,"platformBinary":1,"signingID":"com.apple.TextEdit","teamID":"","cdHash":"D07DBA4427C55E9E4FF430BDD03E05ACEC7A7197"},"signing info (computed)":{"signatureID":"com.apple.TextEdit","signatureStatus":0,"signatureSigner":"Apple","signatureAuthorities":["Software Signing","Apple Code Signing Certification Authority","Apple Root CA"]}}}}
Note:
Though FileMonitor is distributed as an application (in order to satisfy Apple's codesigning and notarization requirements), it is a CLI utility. As such, it should be executed from the commandline, by specifying the path to its application binary:
Moreover, it must remain in its application bundle (which contains required codesigining and provisioning profile information).
Though FileMonitor is distributed as an application (in order to satisfy Apple's codesigning and notarization requirements), it is a CLI utility. As such, it should be executed from the commandline, by specifying the path to its application binary:
FileMonitor.app/Contents/MacOS/FileMonitor
Moreover, it must remain in its application bundle (which contains required codesigining and provisioning profile information).
When executed with the -h or -help flag, FileMonitor will display information about its commandline options:
$ FileMonitor.app/Contents/MacOS/FileMonitor -h

USAGE:
 -h or -help      display this usage info
 -pretty          JSON output is 'pretty-printed'
 -skipApple       ignore Apple (platform) processes
 -filter <name>   show events matching process name
When executed FileMonitor will output JSON "blobs" to standard out. This output can be controlled by various command line arguments including:
- -pretty
JSON output is 'pretty-printed' (beautified). - -skipApple
Ignore process events related to Apple (platform) binaries. - -filter <name>
Show (only) events matching file or process name.
Note, match is performed on the item (process/file path) suffix.
For more details on creating FileMonitor read "Writing a File Monitor with Apple's Endpoint Security Framework".
DNSMonitor
Leveraging Apple's Network Extension Framework, this utility monitors DNS requests and responses.
% DNSMonitor.app/Contents/MacOS/DNSMonitor
...

PROCESS:
{
  processID = 17357;
  processPath = "/usr/bin/nslookup";
  processSigningID = "com.apple.nslookup";
}

PACKET:
  Xid: 10948
  QR: Query
  Server: -nil-
  Opcode: Standard
  AA: Non-Authoritative
  TC: Non-Truncated
  RD: Recursion desired
  RA: No recursion available
  Rcode: No error
  Question (1):
  objective-see.org IN A
  Answer (0):
  Authority (0):
  Additional records (0):
% DNSMonitor.app/Contents/MacOS/DNSMonitor -h DNSMonitor usage: -h or -help Display this usage info -json Output is formatted as JSON -pretty JSON output is 'pretty-printed' -nx Block via 'NX' packet -blockFile of domains / ip addresses to block
When run with no arguments, DNSMonitor will begin monitoring for and printing out DNS packets:
% DNSMonitor.app/Contents/MacOS/DNSMonitor

PROCESS:
{
  processID = 17357;
  processPath = "/usr/bin/nslookup";
  processSigningID = "com.apple.nslookup";
}

PACKET:
  Xid: 10948
  QR: Query
  Server: -nil-
  Opcode: Standard
  AA: Non-Authoritative
  TC: Non-Truncated
  RD: Recursion desired
  RA: No recursion available
  Rcode: No error
  Question (1):
  objective-see.org IN A
  Answer (0):
  Authority (0):
  Additional records (0):
When run with the -json command-line option DNS packets will be output as JSON. The -pretty option will cause the JSON to be "pretty printed":
% DNSMonitor.app/Contents/MacOS/DNSMonitor -json -pretty
[{
  "Process" : {
    "processPath" : "\/usr\/bin\/nslookup",
    "processSigningID" : "com.apple.nslookup",
    "processID" : 17493
  },
  "Packet" : {
    "Opcode" : "Standard",
    "QR" : "Query",
    "Questions" : [
      {
        "Question Name" : "objective-see.org",
        "Question Class" : "IN",
        "Question Type" : "A    "
      }
    ],
    "RA" : "No recursion available",
    "Rcode" : "No error",
    "RD" : "Recursion desired",
    "XID" : 63159,
    "TC" : "Non-Truncated",
    "AA" : "Non-Authoritative"
  }
 },
...
Via the
-block flag, you can specify the path to file containing domains and IP addresses that DNSMonitor will block. The format of this file should be a JSON array. For example, if you wanted to block DNS resolutions of google either by name or by (one of) its IP addresses:
[
  "google.com",
  "172.217.175.46"
]
Now, once DNSMonitor is off and running with this blocklist (e.g.
DNSMonitor.app/Contents/MacOS/DNSMonitor -block blocklist.json), requests, for example to google.com will be blocked, and thus the request will simply timeout:
% nslookup google.com
;; connection timed out; no servers could be reached
Note that by default, to block a DNS query or response, the network flow is simply closed out. However, if you execute DNSMonitor with the
-nx flag, it will instead return an "NX" response, indicating that the domain does not exist.
You can also dump DNSMonitor's 'cache', by sending it a
-USR1 signal to com.objective-see.dnsmonitor.extension:
# kill -USR1
% DNSMonitor.app/Contents/MacOS/DNSMonitor
Received signal: USR1

Dumping DNS Cache:

google.com:(
  "142.250.176.14"
)

objective-see.org:(
  "185.199.109.153",
  "185.199.110.153"
)
gateway.icloud.com:(
  "17.248.245.38",
  "17.248.245.43",
  "17.248.245.45",
  ...
)
Note:
Though DNSMonitor is distributed as an application (in order to satisfy Apple's codesigning, notarization, and System/Network extension requirements), it is a CLI utility. As such, it should be executed from the commandline, by specifying the path to its application binary:
Moreover, it must remain in its application bundle (which contains required codesigining and provisioning profile information).
Though DNSMonitor is distributed as an application (in order to satisfy Apple's codesigning, notarization, and System/Network extension requirements), it is a CLI utility. As such, it should be executed from the commandline, by specifying the path to its application binary:
DNSMonitor.app/Contents/MacOS/DNSMonitor
Moreover, it must remain in its application bundle (which contains required codesigining and provisioning profile information).
DNSMonitor leverages Apple's System/Network Extensions Framework to capture system-wide DNS events. Apple places several restrictions on such extensions. Specifically such extensions must first be copied to the
/Applications directory. And the user must manually approve any extension before it is allowed to begin capturing (network) events.
Thus, to run
DNSMonitor.app, you must:
- Ensure the application bundle
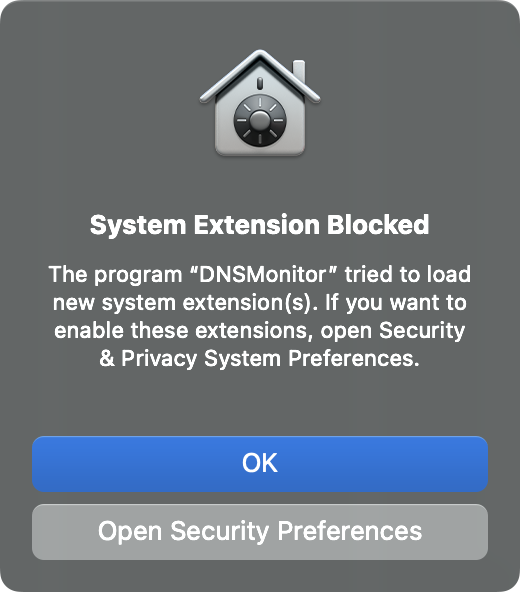
DNSMonitor.app, has been copied into the/Applicationsdirectory. If not an error will be displayed:% ~/Downloads/DNSMonitor.app/Contents/MacOS/DNSMonitor ... ERROR: As DNSMonitor uses a System Extension, Apple requires it must be located in /Applications - Approve the System Extension. First, macOS will display a prompt:
Click "Open Security Preferences" to open the System Preferences application (it should load the "Security & Privacy" pane). Click "Allow", then authenticate to allow theDNSMonitorextension to load: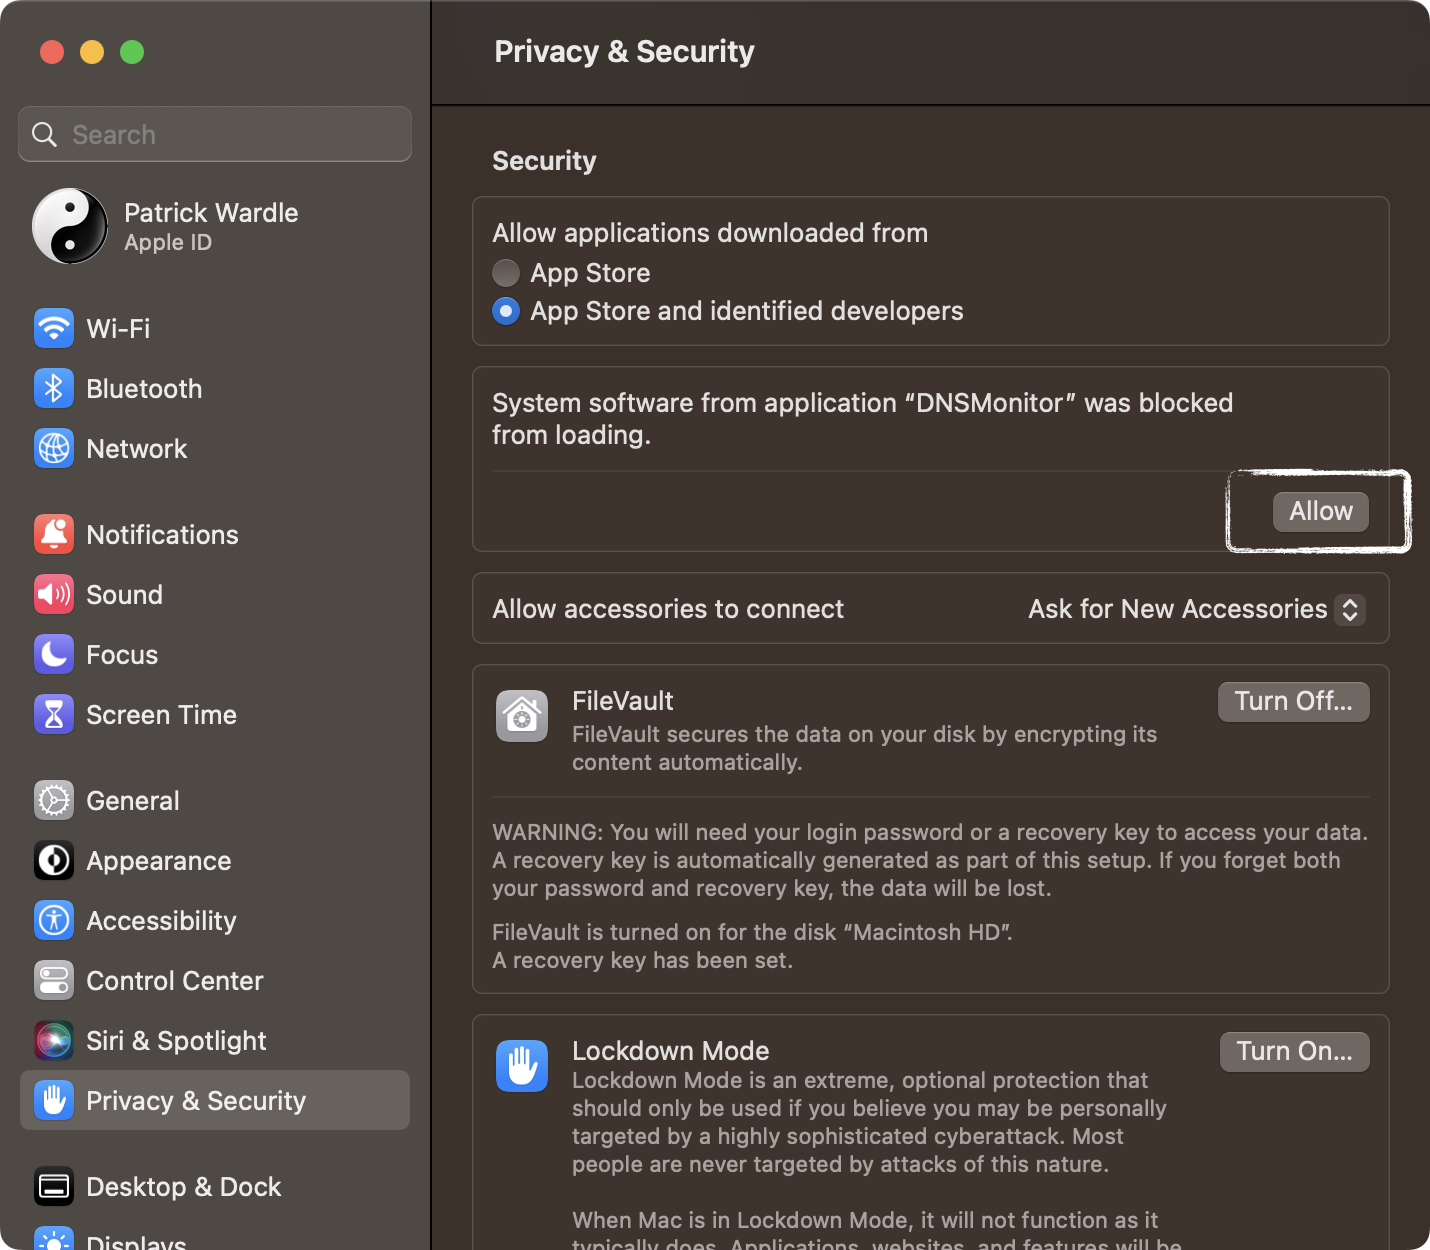
- Once the extension has been approved it will load. However, macOS will then request approval to allow it to monitor DNS traffic.
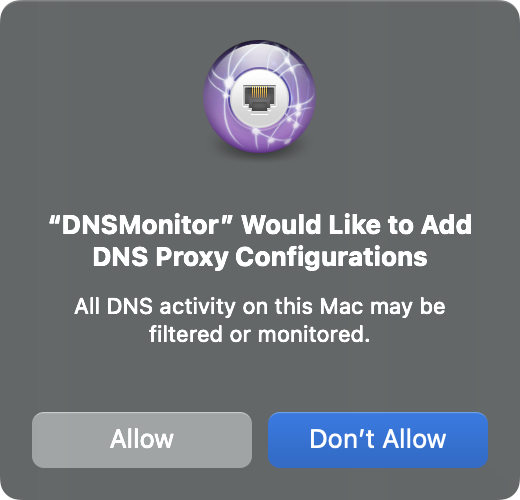
Click "Allow" to allowDNSMonitorto monitor DNS traffic.
To terminate
DNSMonitor, simply hit control+c. This will trigger a prompt from the operating system to unload the extension:
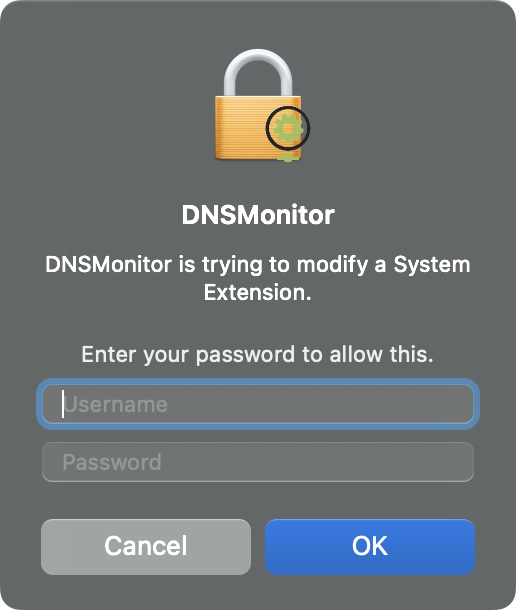
...authenticate by entering your user name password and click "OK". This will remove
DNSMonitor's extension and cause it to cleanly terminate.